Archive
Crockpot Cinnamon Almonds
CROCKPOT CINNAMON ALMONDS:
1 1/2 cup brown sugar
3 Tbsp Cinnamon
1/8 tsp Salt
1 Egg White
2 tsp Vanilla
3 cups almonds
1/4 cup water
Mix together sugars, cinnamon, and salt. Set aside.
In another bowl, whisk the egg white and vanilla until frothy. Ad almonds. Thoroughly coat almonds in the egg white mixture. Add cinnamon mixture to almonds and toss to coat.
Thoroughly spray your crock pot with non-stick cooking spray or you could use oil of your choice. I use spray olive oil because I do love me some savory flavors. Add the almond mixture.
Cook on low 3-4 hours, stirring every 20 minutes. In the last hour, add the 1/4 cup of water and stir well. This ensures a crunchy yummy coating.
Make sure to cook the nuts for 45 minutes after adding water. You have to stir really well.
Once finished, spread almonds on parchment to cool. Separate them a little so you do not have large clusters.
Medieval Mushroom Pie
So, it’s definitely been a few years since I posted here. Mostly it has been updates to my convention schedule, which aren’t really that interesting I suppose. Still, it’s a good resource when I try to remember what I did and when. Hah! But it’s been ages since I posted any recipes. With the Coronavirus pandemic, there’s been a lot of folks who are now at home, and looking for things to do. A friend started a “British Bake Off” style Facebook Group, for folks to share recipes, bake things together during the “theme” weeks, and more.
I mentioned for Pie weekend I’d make Mushroom Pie. I have this recipe on another post, but it’s kinda of buried. So! Here’s the Mushroom Pie recipe I spoke about. This recipe came from a Swedish medieval music CD called “Figs, Fiddles and Fine Play”. I picked it up when I was visiting my Star Wars Galaxies Guildmates from Gorath. Bonus content after receipe!

Mushroom Pie
Ingredients:
17oz Mushrooms
2 tablespoons olive oil
3 1/2 oz cottage cheese or Ricotta
1 oz Pecorino cheese
1 oz cheddar cheese
1 teaspoon ground ginger
1 teaspoon black pepper
2 tablespoons chopped garlic
1 tablespoon olive oil to cook the mushrooms
Pie crust:
1 1/2 cup flour
5 1/2 oz butter
2 tablespoons cold water
1 teaspoon salt
Mix up the pie dough and press it into an oven proof dish. Put the pie dish in the fridge while you cook the mushrooms. Wash the mushrooms and cut them in half if necessary. Saute mushrooms briefly in olive oil until they shrink a bit. Mix cheeses, oil and spices with the mushrooms. Put the filling in the pie crust and bake for 45 minutes in pre-heated 400F oven. Sprinkle chopped parsley over the pie and serve with a good ale.
Bonus!
Listen to their Bandcamp here for the album: https://erikaskupmark.bandcamp.com/album/fikon-fiddlor-och-finlir
A PDF of the whole recipe book: http://www.draam.com/falsobordone/cd/figs_fiddles_booklet_and_cover.pdf
Springerle Experiment the Third
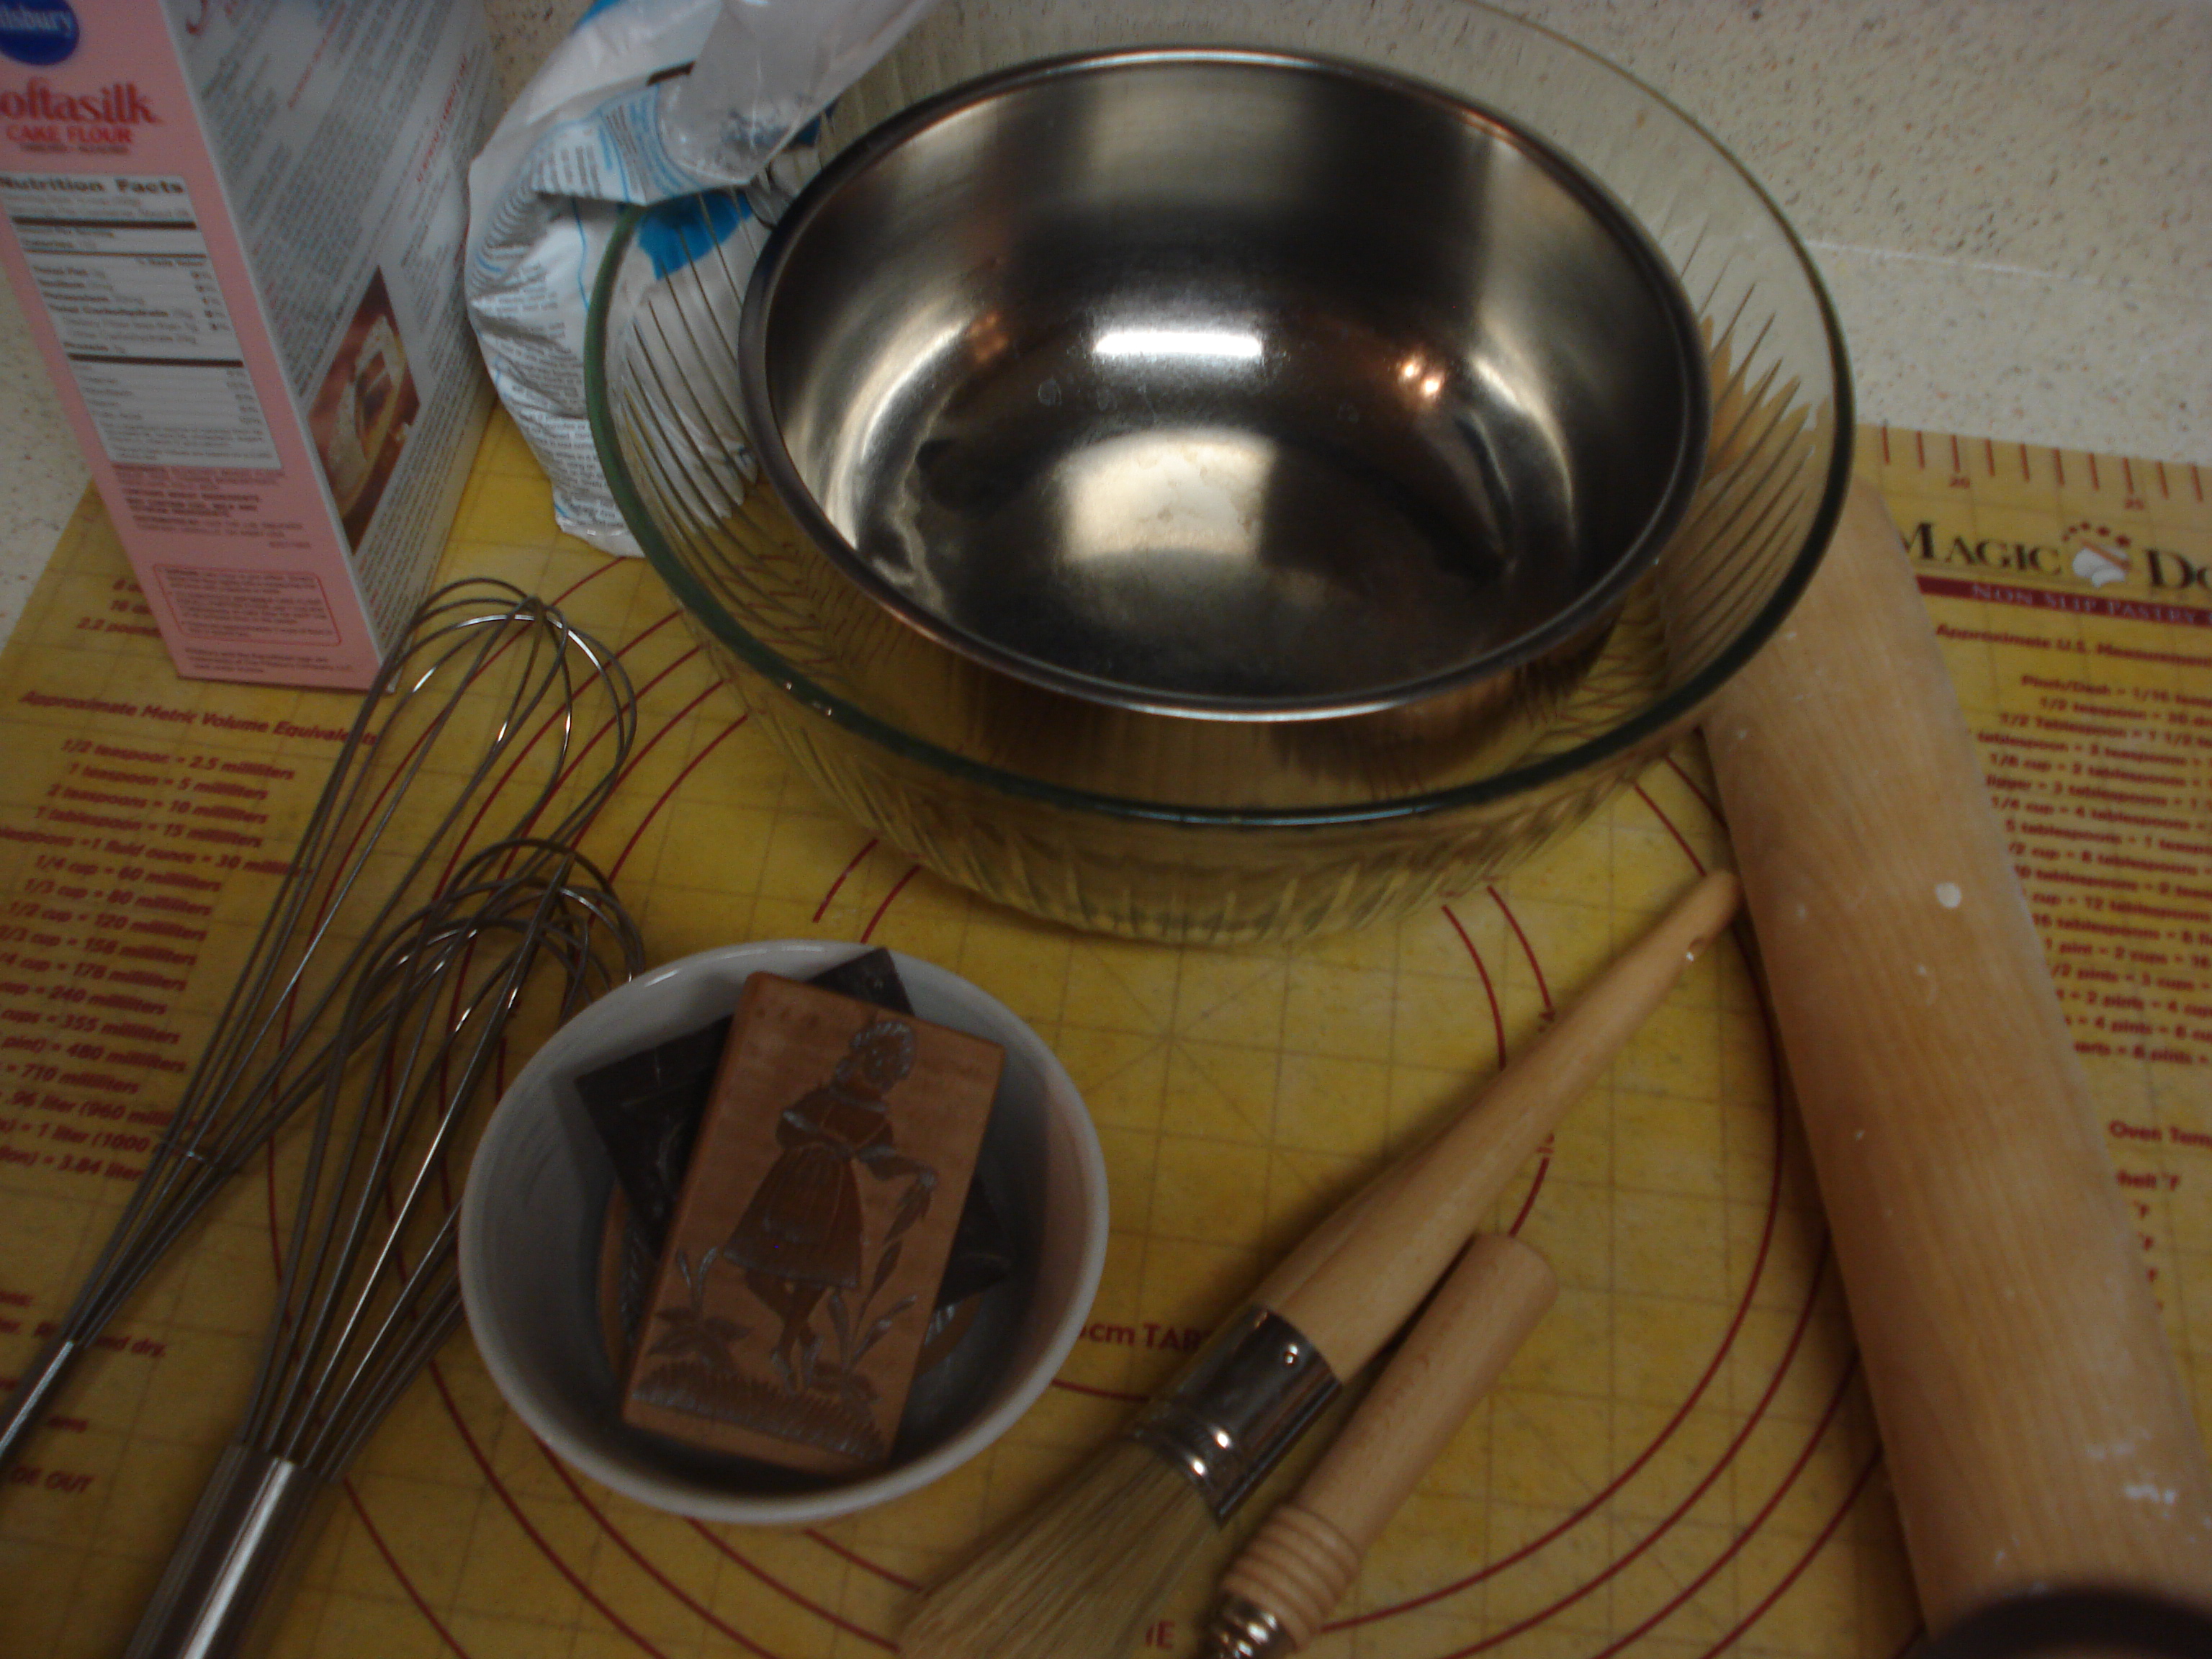
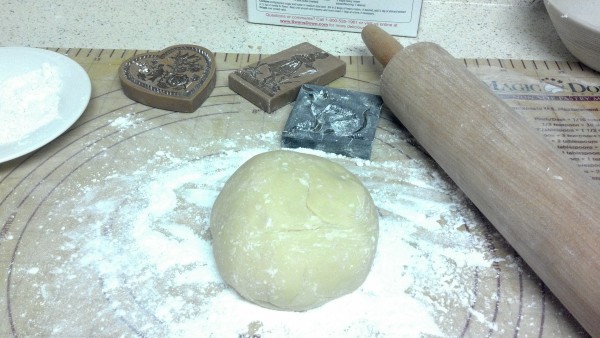
I decided to try yet another Springerle recipe last weekend. I really enjoyed the tutorial videos at SpringerleJoy.com. You can view the individual videos here. I didn’t use the recipe they have on the website, but the four ingredient recipe she used in the “making the dough” tutorial. Also, I really really need a stand mixer for me to make any batches larger than this one. I also picked up some new tools, a pasta wheel and a pastry brush.
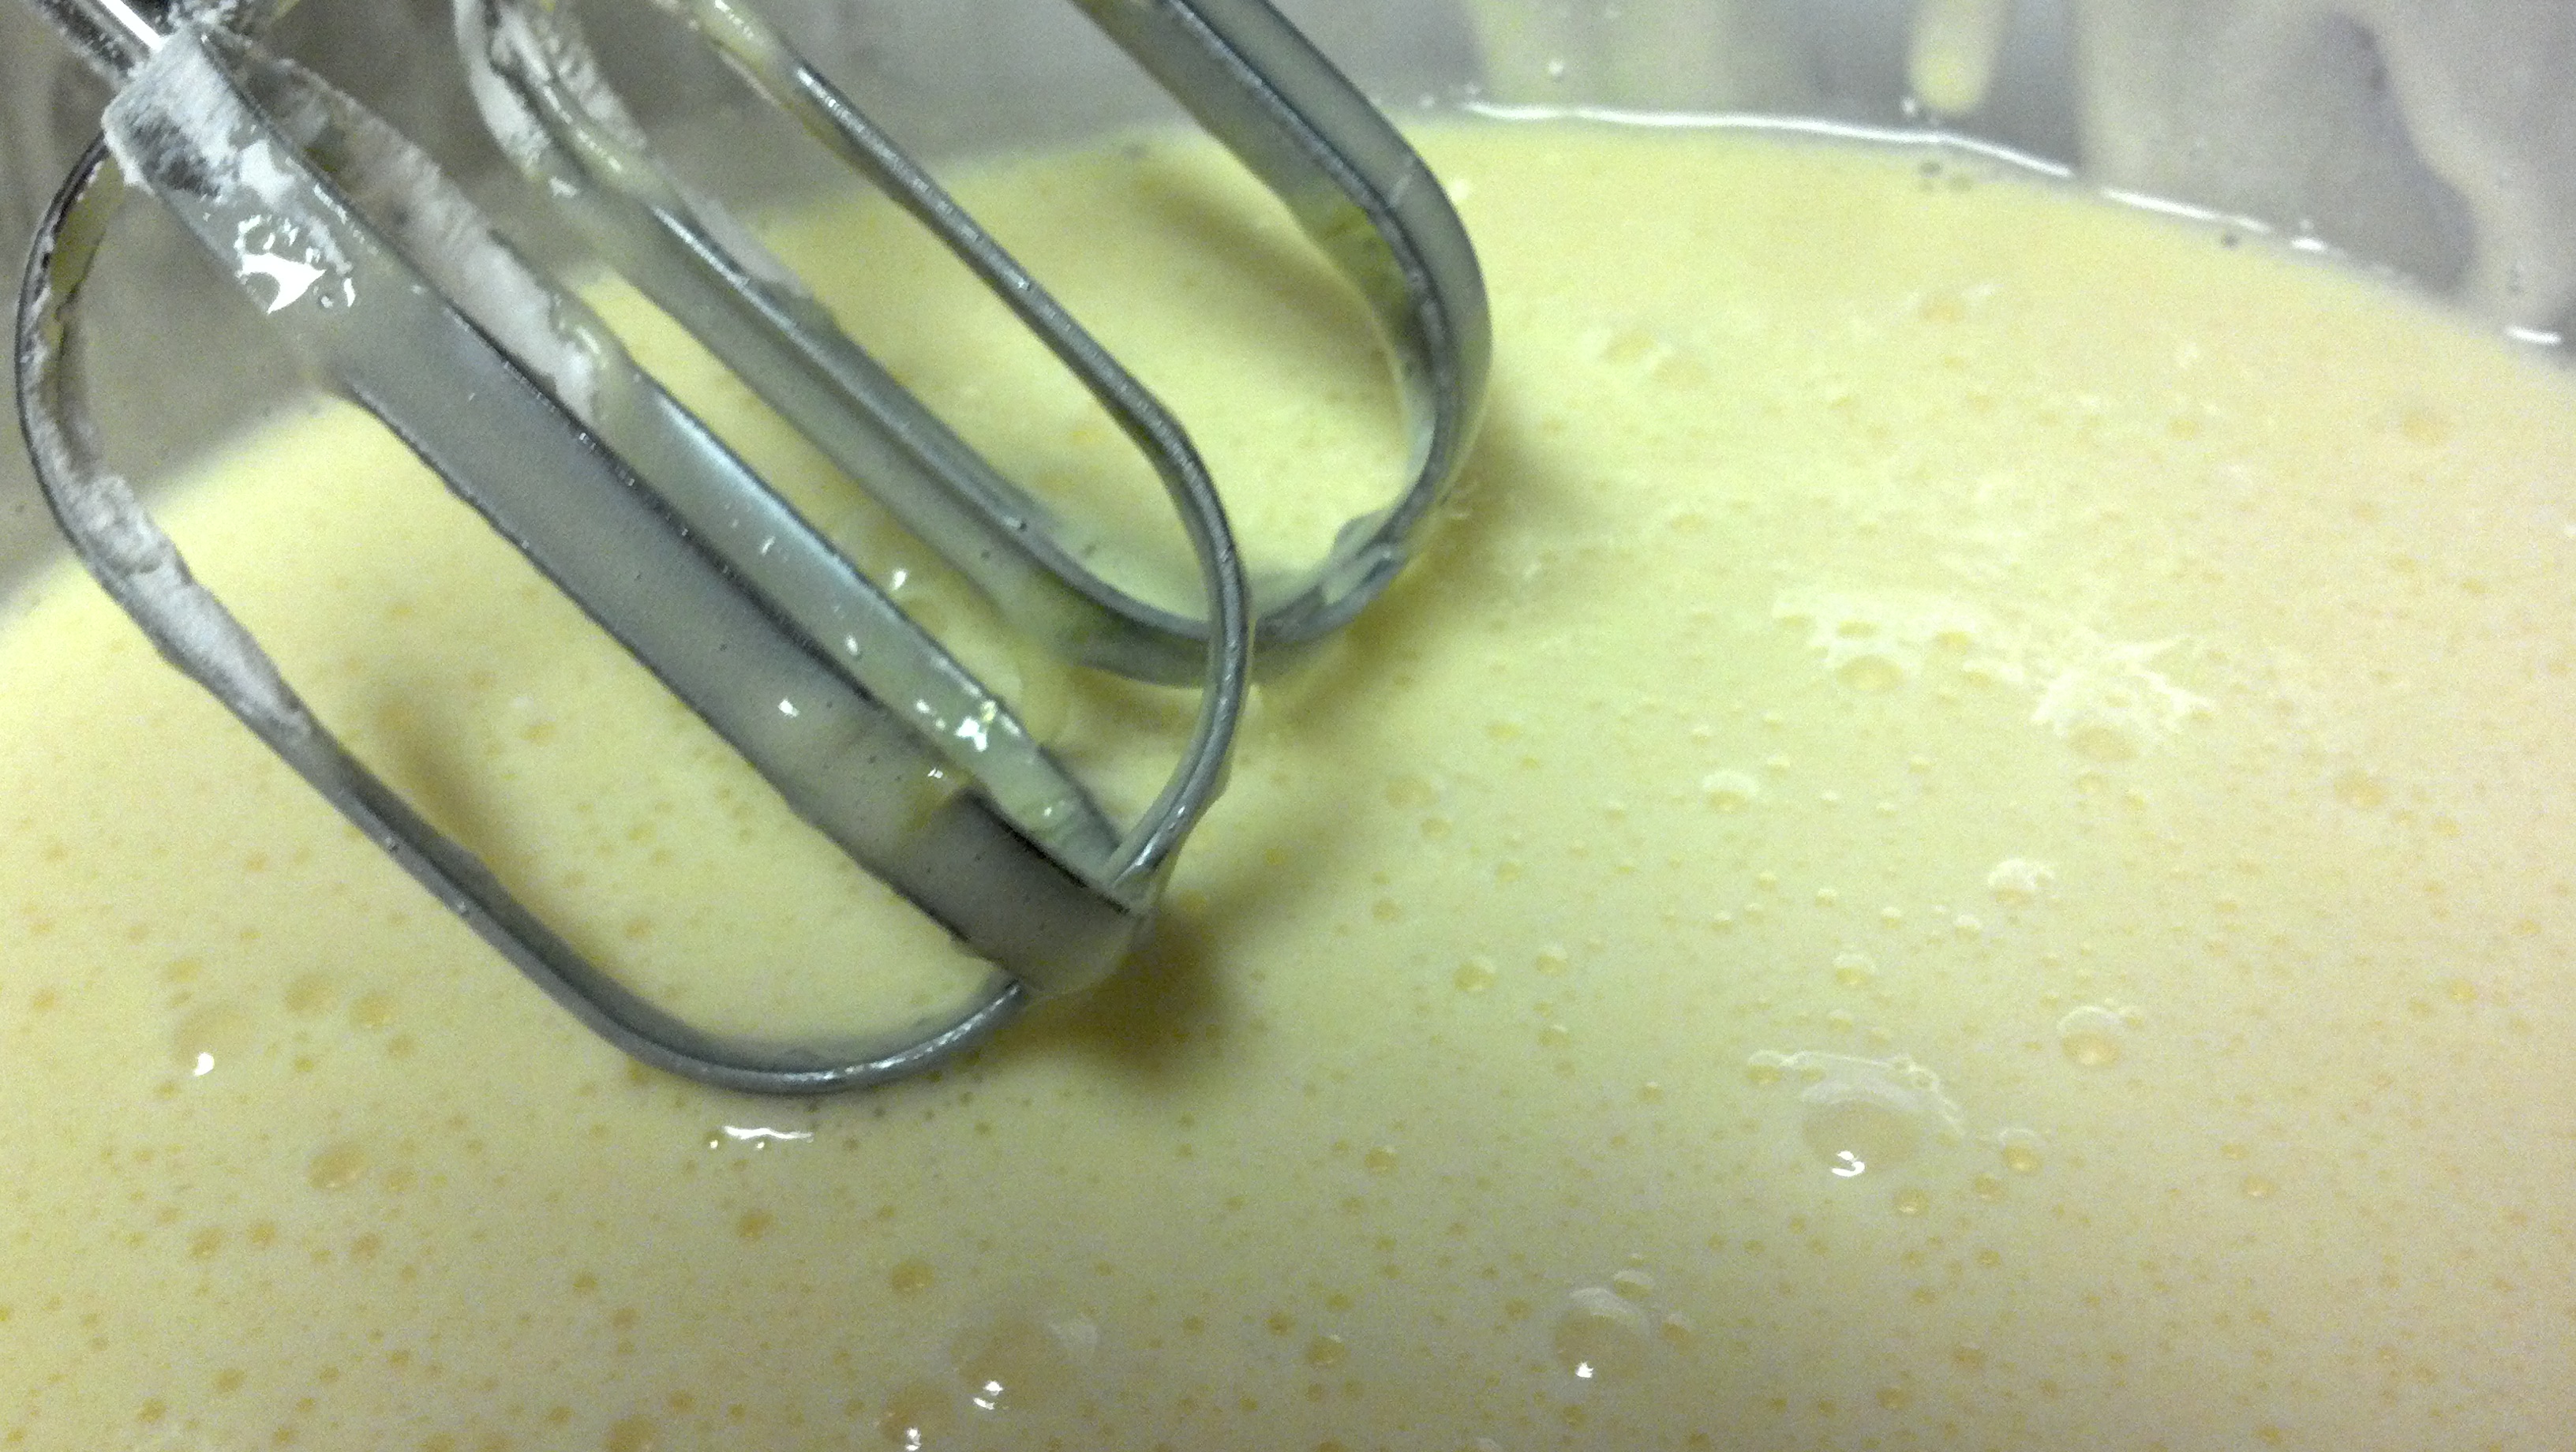
One of the things which was important from her video was beating the eggs for 10 minutes, until they were this really thick consistency. Since this dough doesn’t have any sort of baking soda or hartshorn, it’s all based on getting this eggs whipped correctly. At least, that’s what my chemistry brain is telling me. Thankfully, I had planned accordingly for how much time it would take, and was wearing thick socks on my feet instead of my usual barefoot in the kitchen routine. I know. Don’t go there. Anyway, the eggs got thoroughly beat up. Pardon the terrible picture. I’m holding the spatula and the camera at the same time.

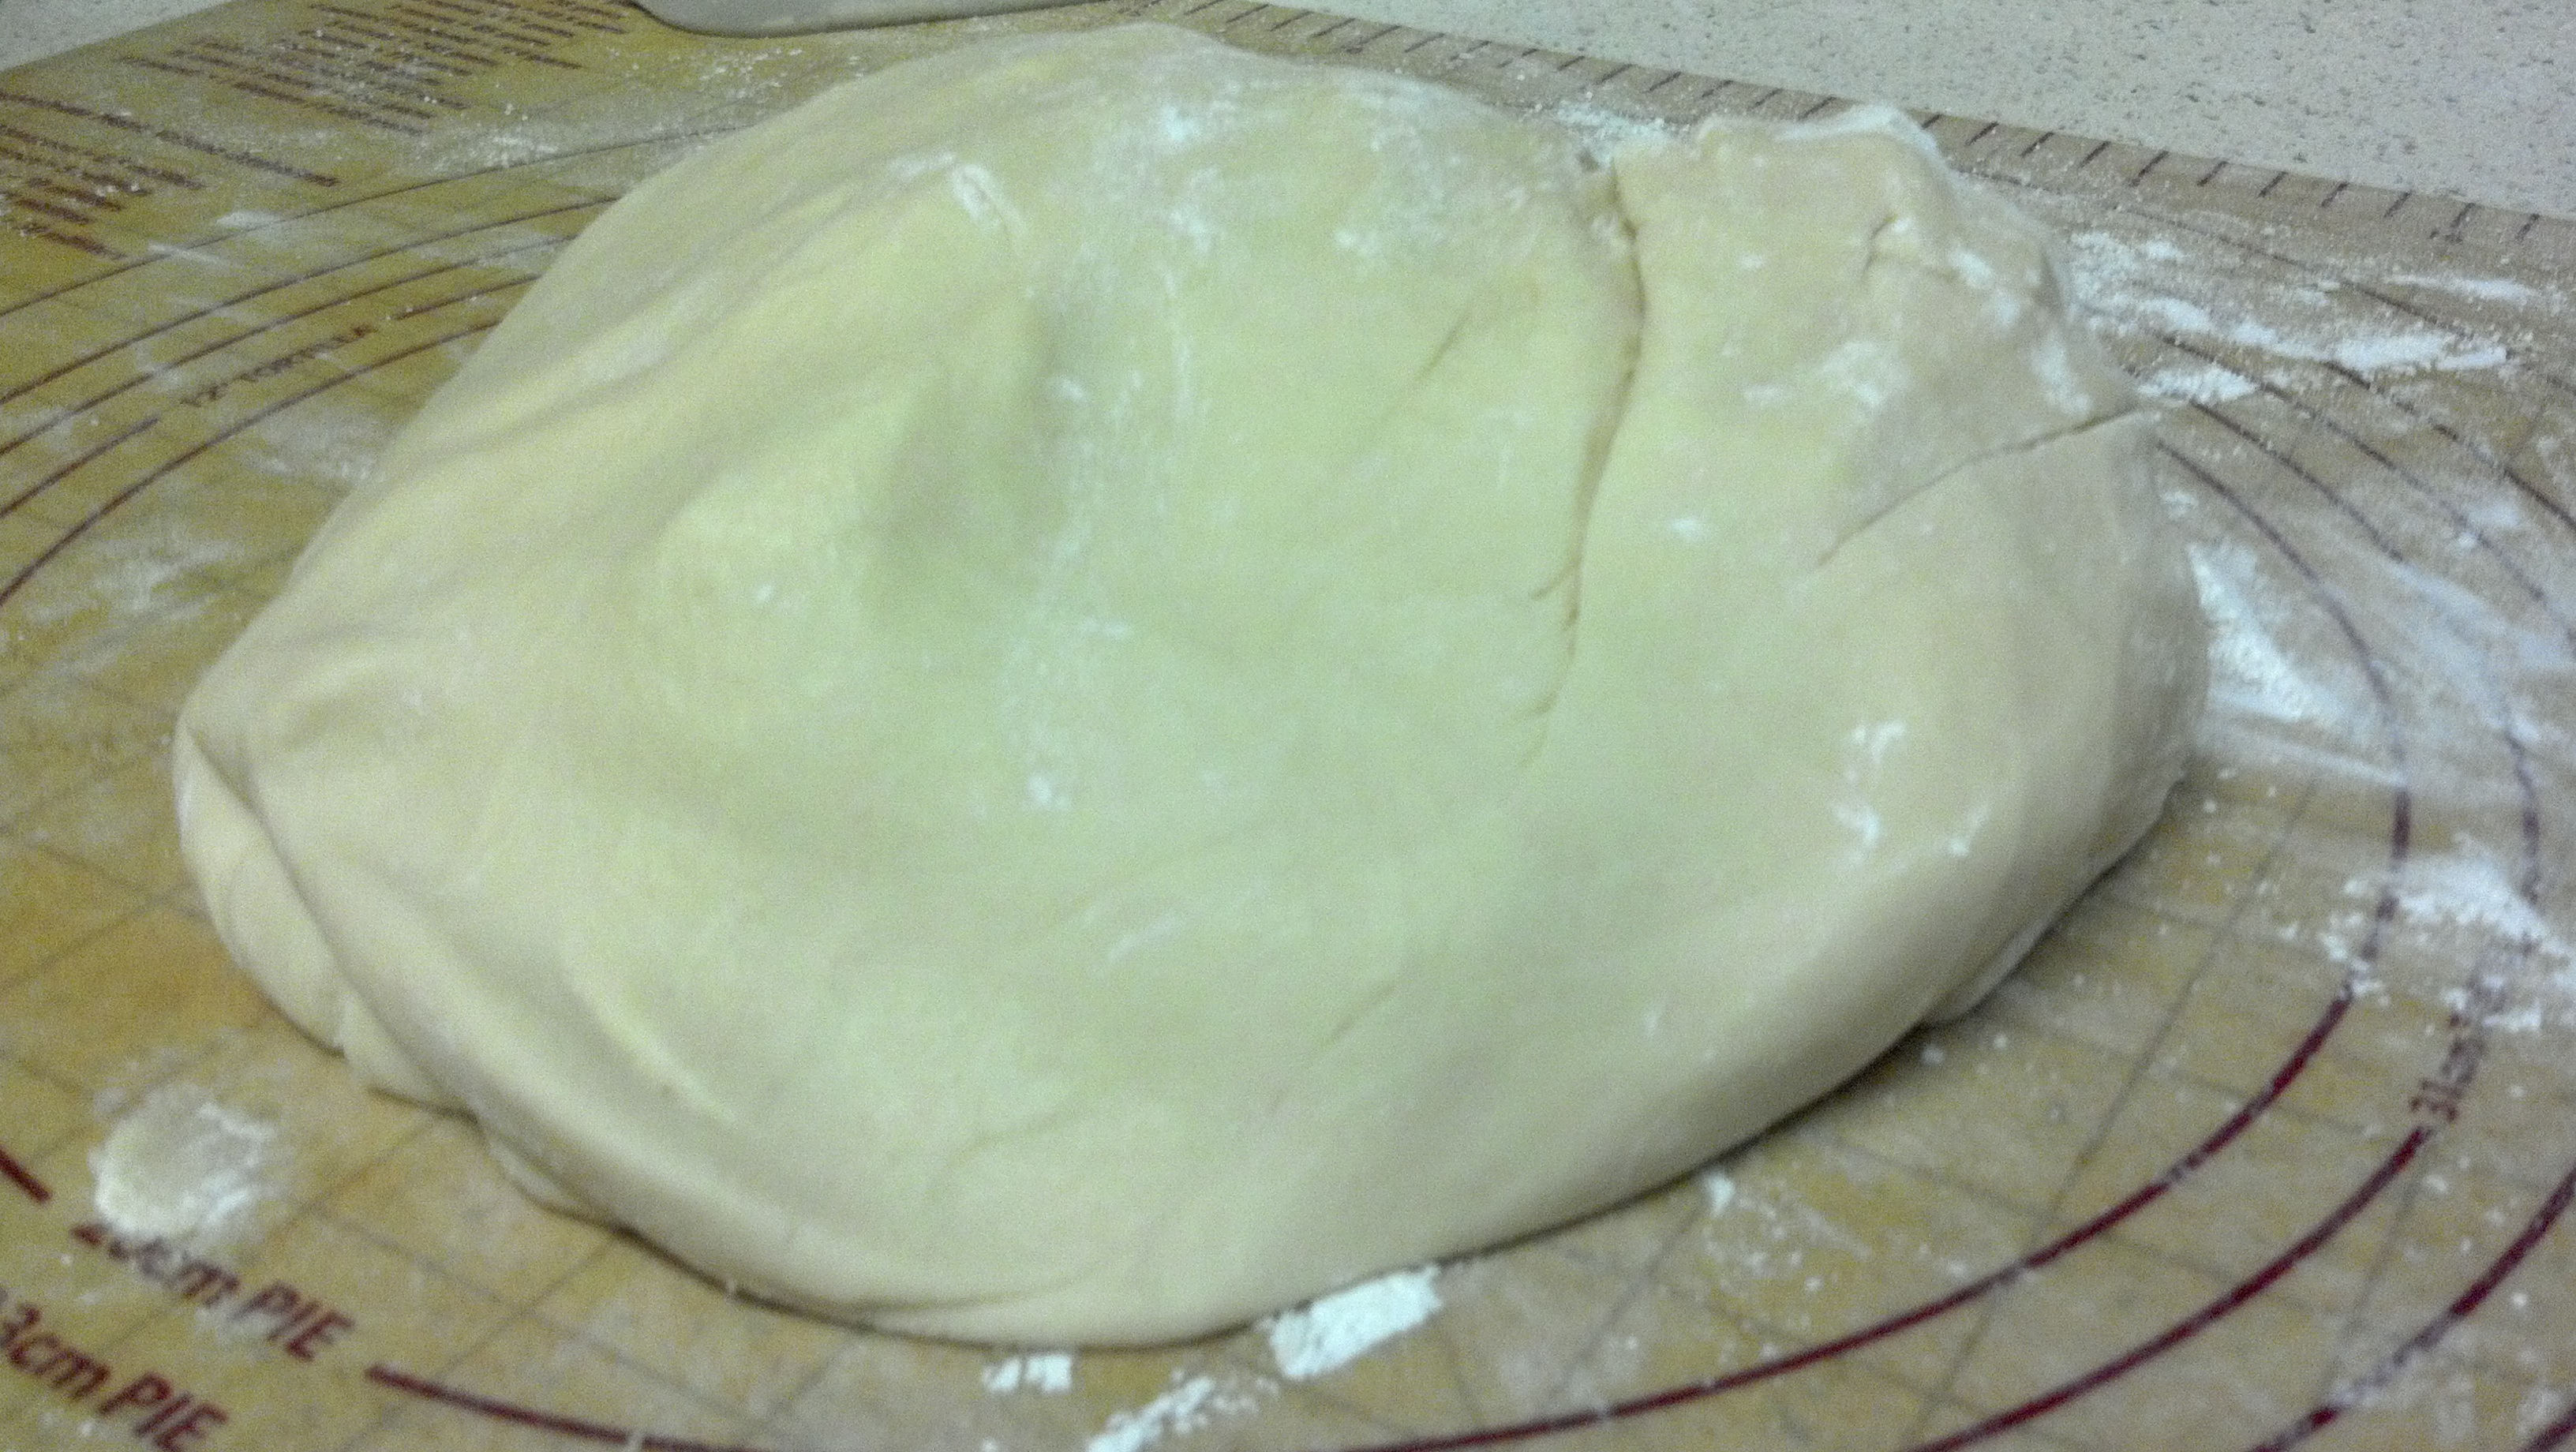
I used the SpringerleJoy’s suggestion of just using a whisk to mix up the powdered sugar and flour instead sifting. It worked splendidly without having the mess and measurement issues of sifting. I made quite the mess in Experiment #2. I ignored her suggestion of a whole teaspoon of almond oil. It’s so SUPER concentrated, so I stuck with 1/8 of a teaspoon. The rest of the recipe came together just fine. I let the dough sit, covered with a towl, for 20 minutes before I started working it. This gives the flour time to work.
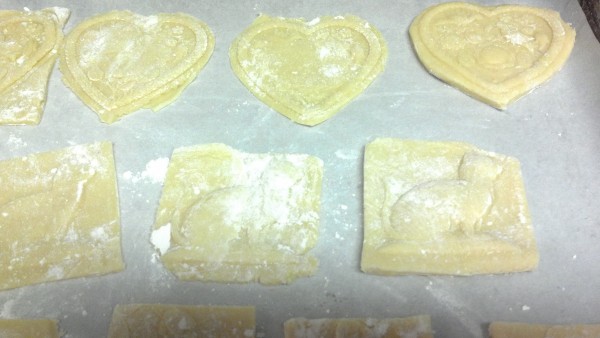
After the 20 minutes was up, I pulled out a small amount of the dough. Note, it’s still very sticky at that point. I sprinkled quite a bit of flour on the pastry mat, and worked it into the dough. When it felt right, I used my new brush to dust the top of the rolled out dough and to dust the cookie mold. The cat mold is pretty deep, so I make sure to press down a bit harder when using it.

I know, another blurry one. It’s difficult to try to take a picture as your holding down the mold properly. Last time I made these, I used powdered sugar on the dough and the cookie mold. However, I found it too sweet, as there is already a lot of sugar in the dough. I switched back to flour. I quickly went through each batch of the sticky dough, trying different thicknesses of dough, and playing with the new pasta roller thingy. For straight up cut outs, I used a dough scraper. With the cat mold, I used a doughnut cutter to make round shapes. The cat pattern was the easiest to work with. I really liked how the circles looked when cut out.
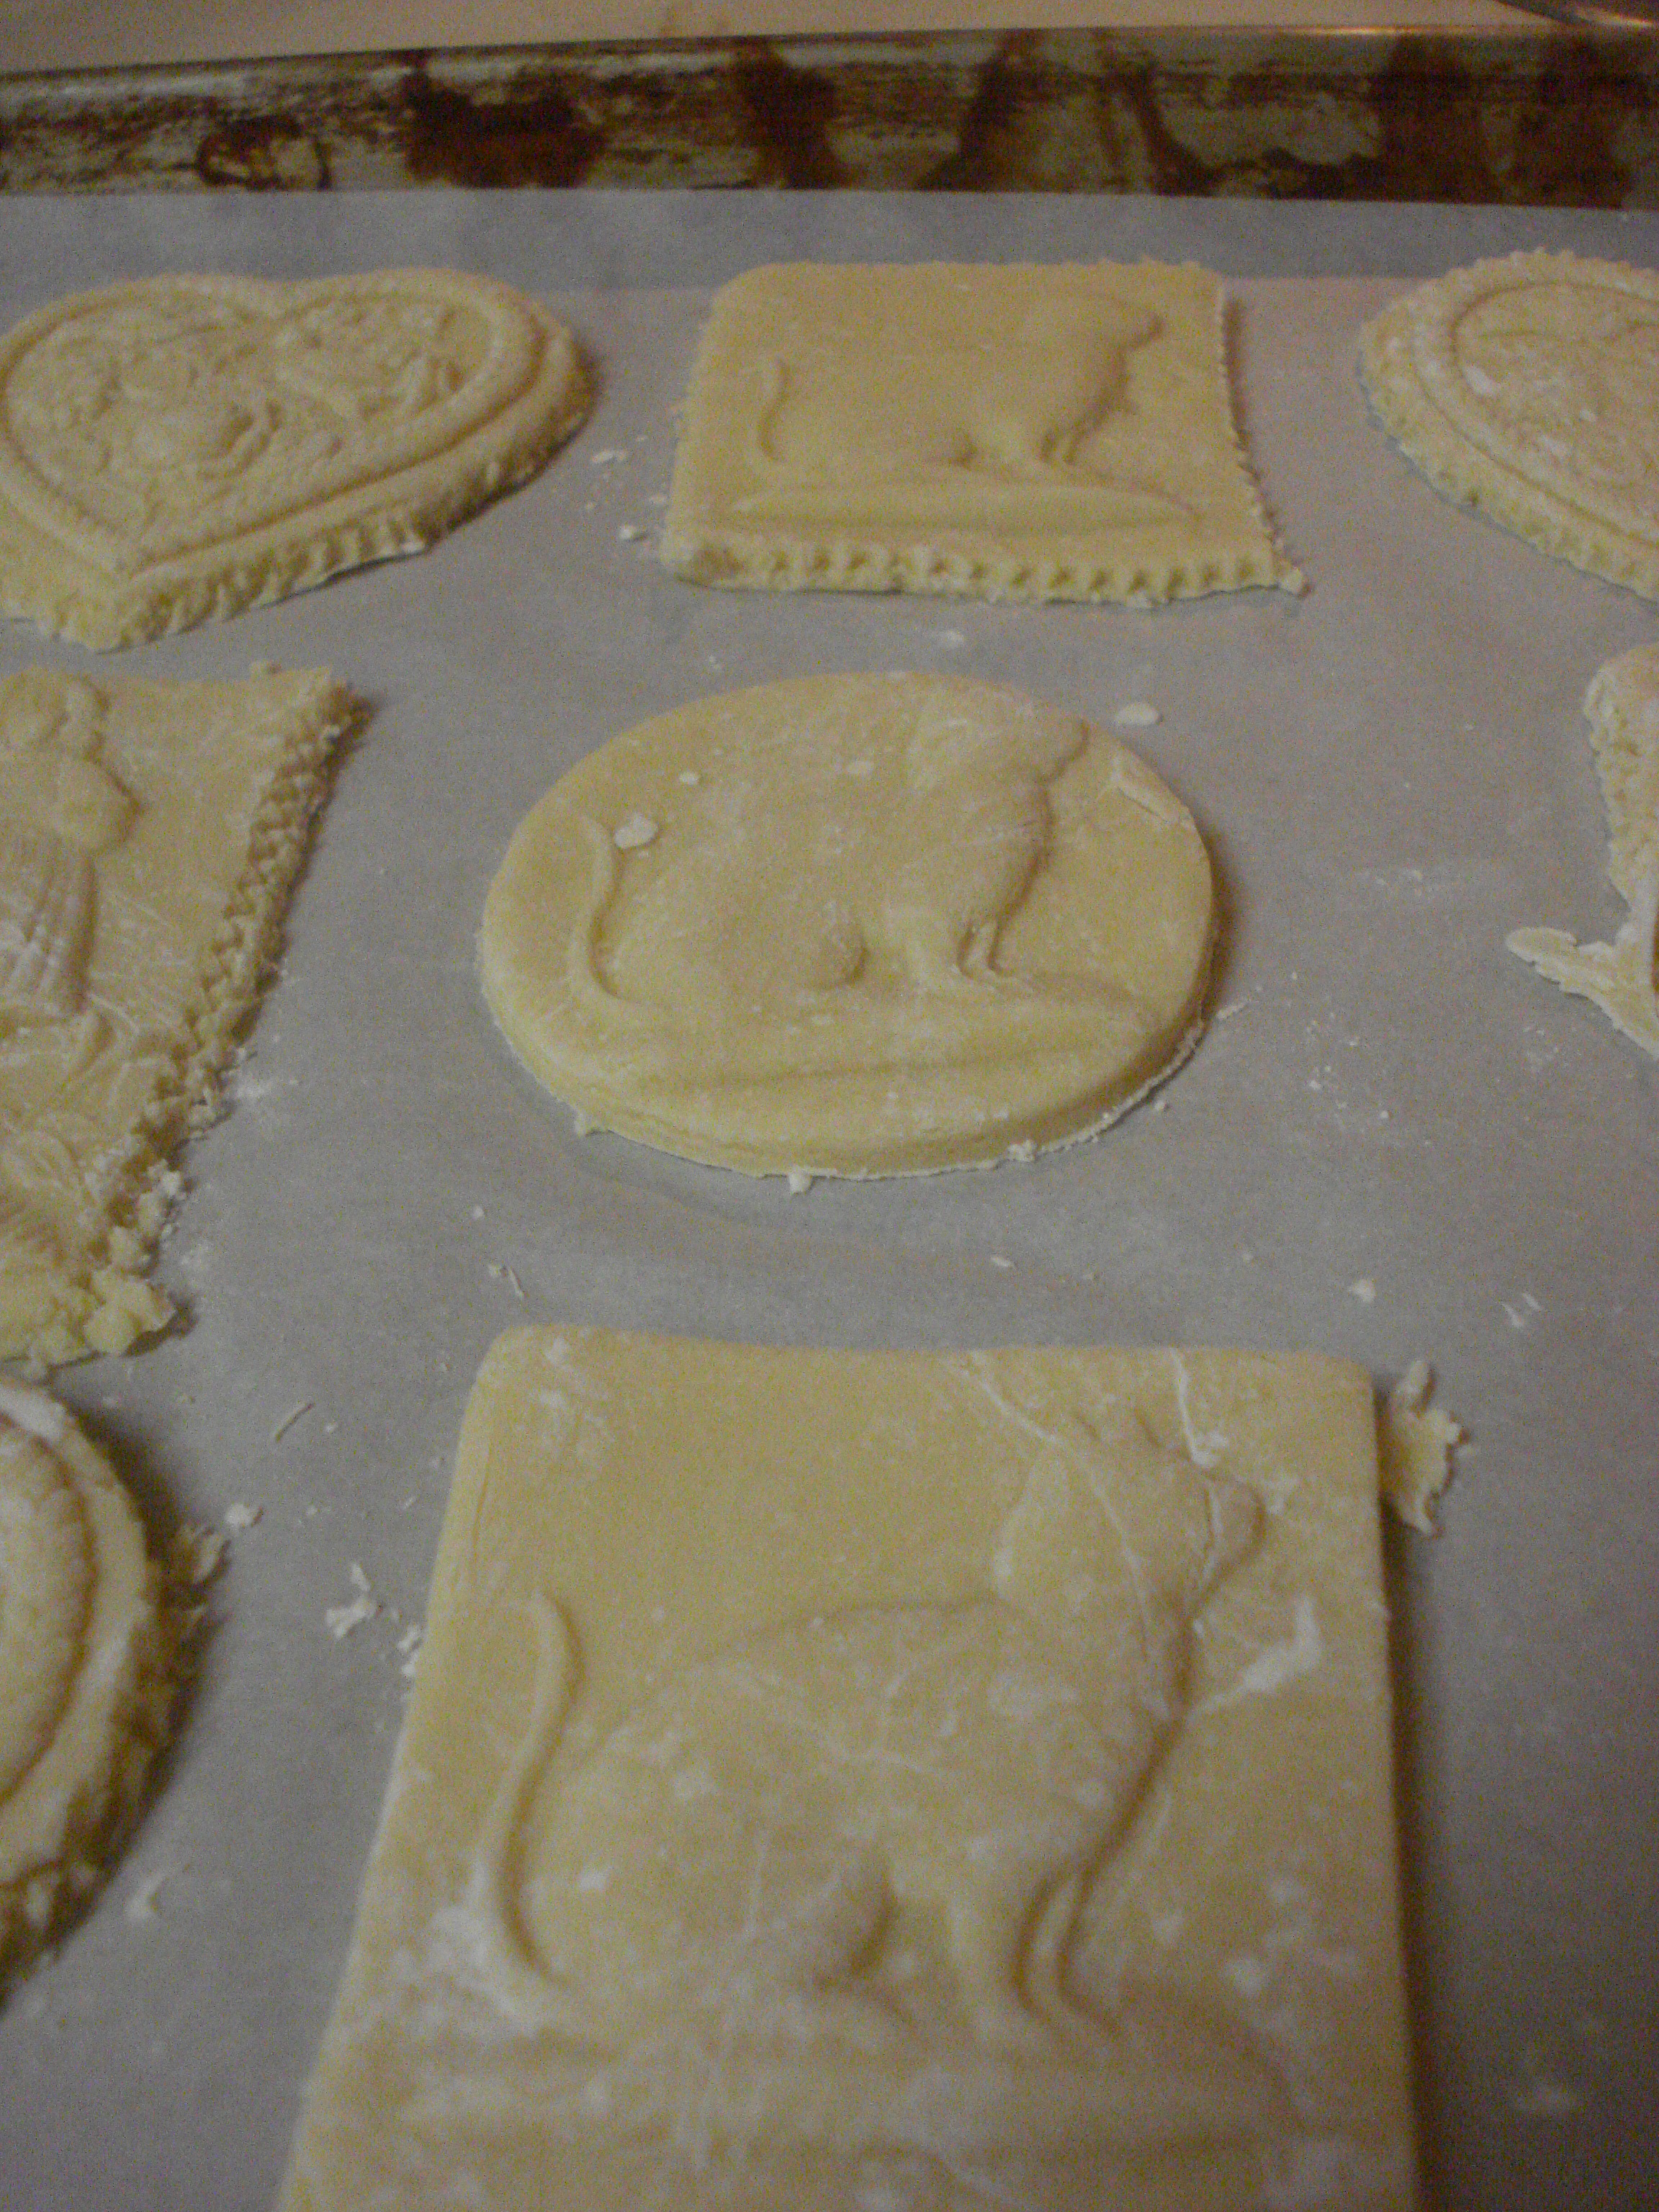
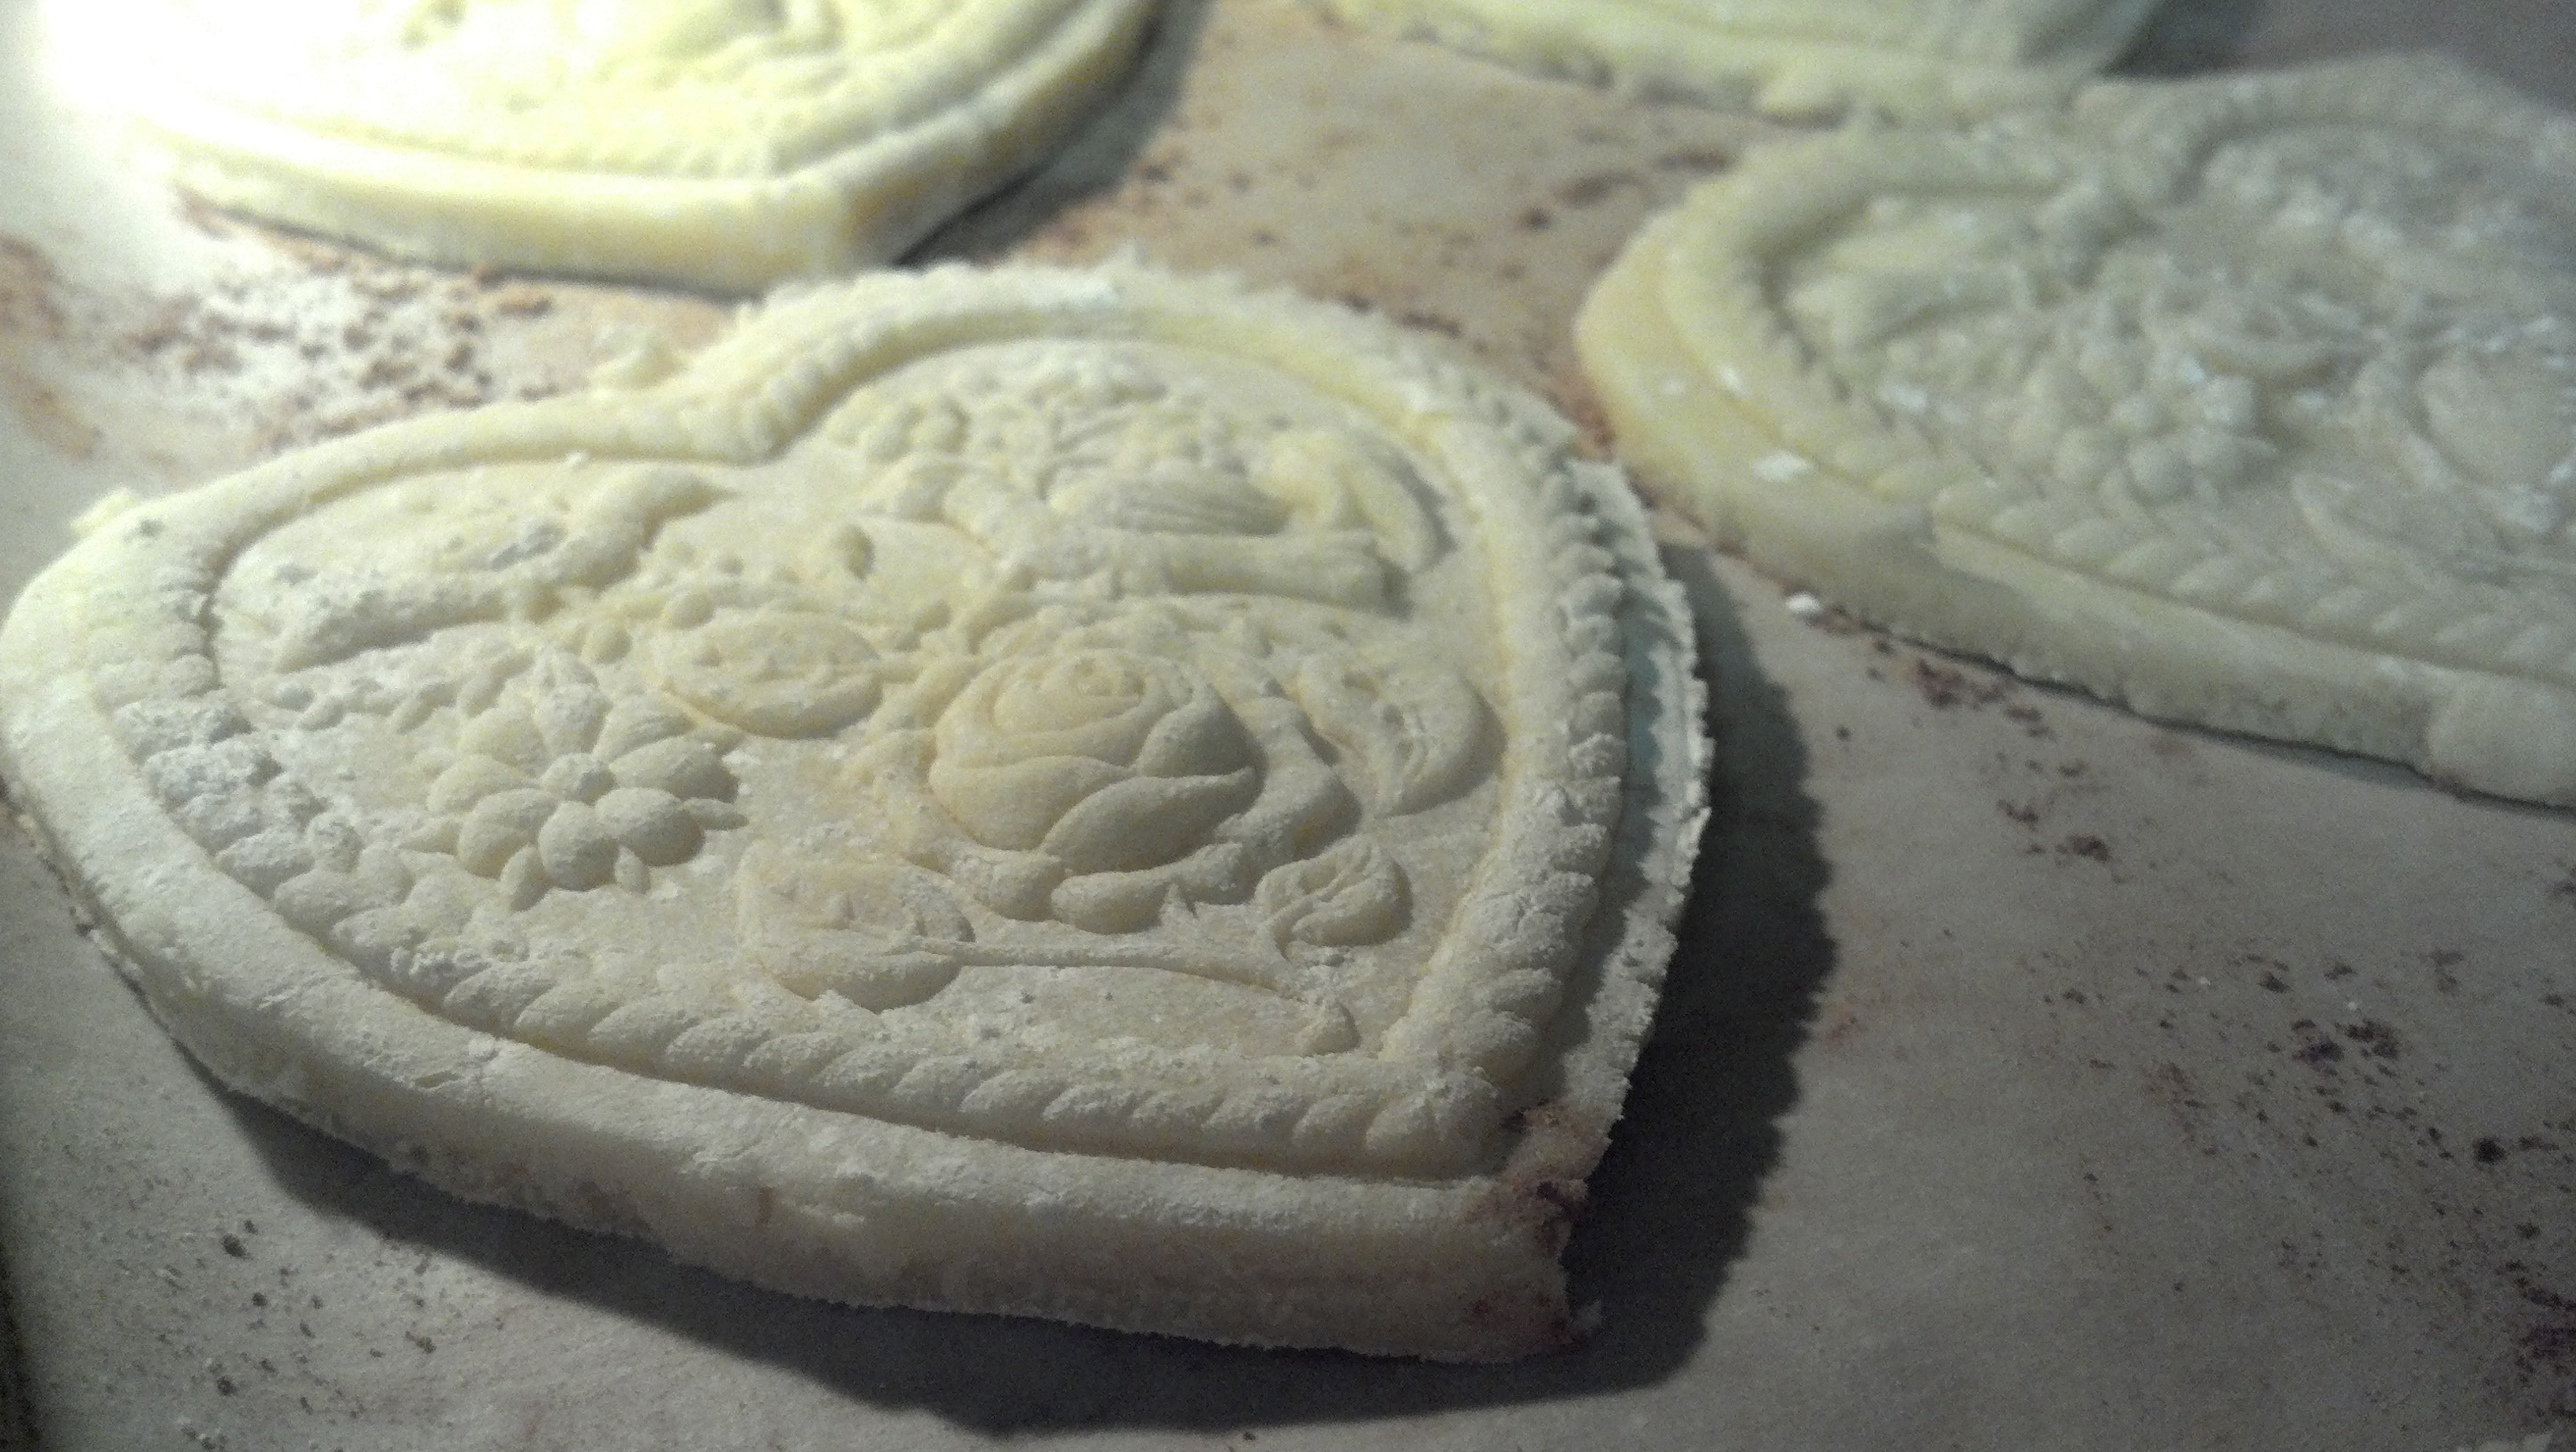
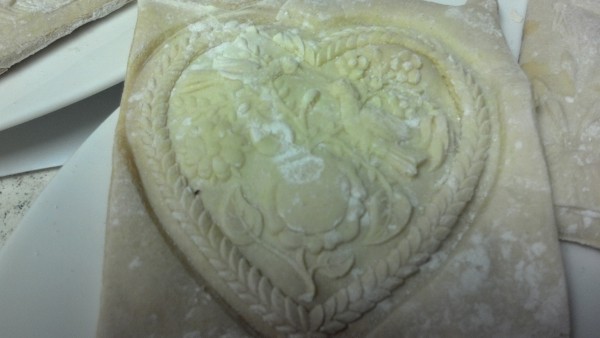
Of course, the most difficult mold to work with is the heart one. There is a lot of detail in this mold, and you have to be very careful while cutting this one out. If you pull the dough too hard when cutting it out, you’ll pull the design out of shape. If you didn’t use enough flour on the dough or the mold, it will get caught in tiny crevices. Much harder to work with. You can work edges back in shape a bit with your fingers, but the heart is the hardest one for that type of manipulation. See the detail?

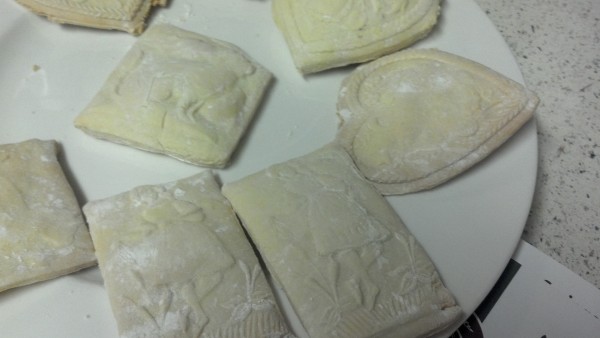
I let this batch of Springerle sit about 16 hour to dry out. The weather was cold, but not humid. The texture of cookie was perfect; it should have a dried crust feel to it. Per the video instructions, I left them in for 6 minutes and then checked up on them 2 minutes later. Since ovens and weather can affect how they turn out, it’s a good way to tell how things are going. They’re supposed to be only slightly brown on the bottom and NOT at all at the time. I think that by putting these on the bottom rack of the oven, it gave me the desired effect.
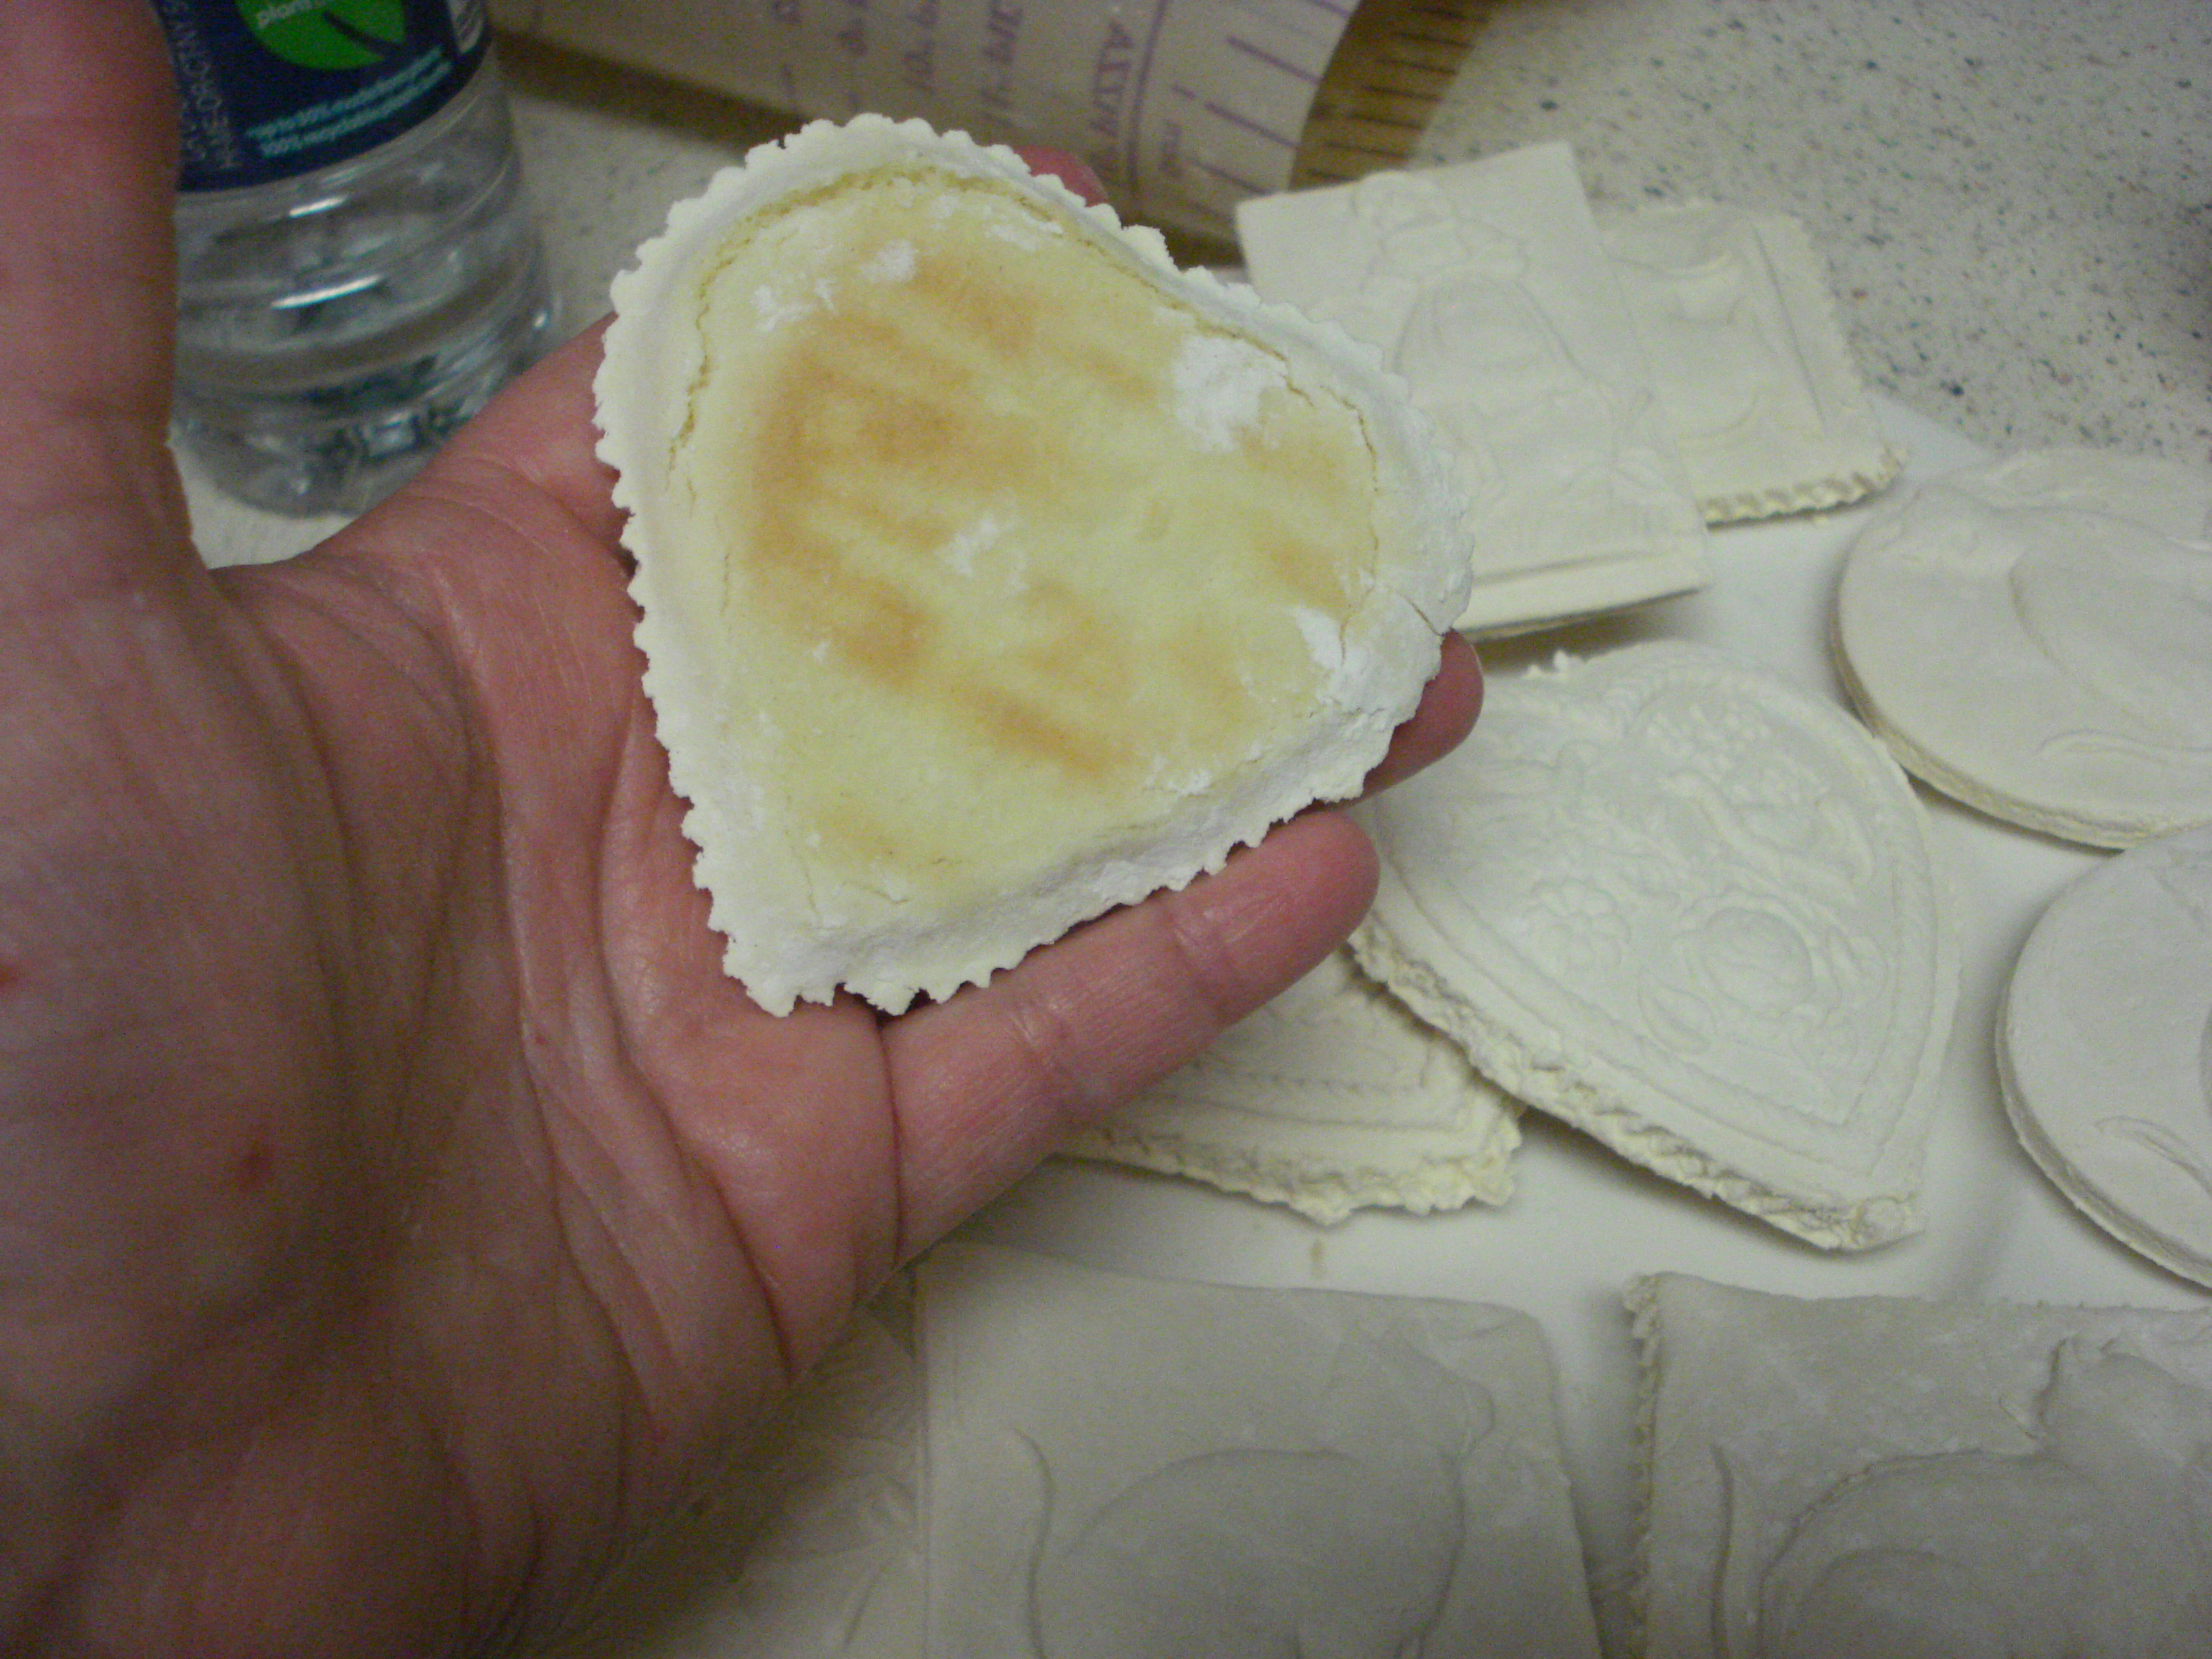
The second sheet of cookies had some thicker cookies on it, so I checked it at 6 minutes and gave it another 3 minutes. This seems to be the perfect time/size for my oven. I even managed to get the “foot” that these cookies are supposed to have, as they rise instead of spreading out.

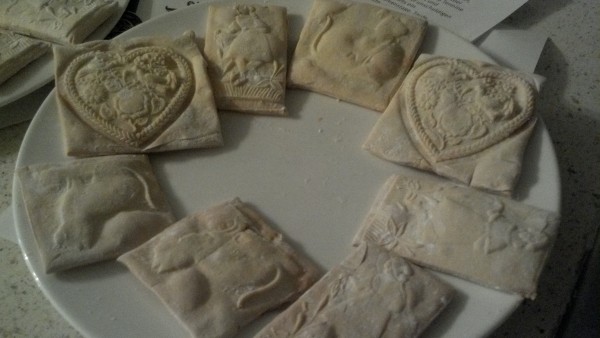
As you can see, I’ve got the texture, the color, and the entire feel for this cookie. I”m going to stick with this recipe for now, but try different flavors and textures. I found recipes for Green Tea Springerle, Chocolate Springerle, and all sorts of other flavors. I also want to make the “proper” flavor, which is the Anise cookie. I have other ideas for savory versions down the road. I’ve started a ‘beta” program with the cookies, foisting them off on co-workers and loved ones. Once I get a stand mixer, I can whip these up quicker with less mess. I love being a Springerle nerd.
Springerle Experiment – Take 2
I’ve been terrible about updating this post, but it’s been a squirrely week for me. I made a batch of Springerle last weekend, with the recipe coming from Ken Hamilton, The Springerle Baker. His recipe is pretty huge, I found out. You really never think about how much mess can come from 6 cups of powdered sugar and 8 cups of flour. I followed his full-length recipe, not the shorter quicker version. This was also the recipe which made me realize I SO NEED A STAND MIXER. My poor little hand mixer got quite the workout. I figured I was starting out well with the eggs!
It took QUITE a lot of work to get all the ingredients in. I had to use numerous bowls to handle the sheer amount of dry ingredients, along with all the sifting involved. WHY I DID NOT JUST CUT IT IN HALF, I’LL NEVER KNOW. Anyway, the dough turned out quite nice. I used the same amount of almond oil in this batch, as I did my original one. Since the batch was SO HUGE, the almond oil was perfect. As an aside, almond oil and almond extract are WAY different. The oil is SUPER concentrated. Seriously. You have NO idea until you actually work with this stuff. But it sure did make for a pretty looking and smelling dough.
Shiny and silky, eh? At this point, it’s actually still a bit sticky, even letting it rest and letting the flour work itself out in the dough. You did know that is why you let dough rest, right? MAGIC THINGS ARE HAPPENING. Once rested, it’s time to start working in the flour until you have a dough which will hold an imprint from the Springerle molds, but not actually stick to them. Or the rolling pin and mat, either.

This is actually one of my favourite parts. I love working the dough. It’s quite the soothing process. And I say this as someone with ZERO patience. This is why I do not often bake; I have a hard time waiting on anything. It’s almost like this dough is more tactile than others I’ve worked with, for regular cookies and such. Maybe it’s because this process is so ritual driven in many ways. Once I had the dough where I wanted it, I decided to try using the extra powdered sugar for the molds. Since flour gets all gooey and cakey with water, it can make for a pain in the arse when things get sticky. With sugar? It’s easily dissolved in water, so you can clean the molds easily. At least, that’s what I read on the internets. ONE NEVER KNOWS IF ONE IS BEING TROLLED.

As it turns out, I was not being trolled! The powdered sugar was quite easy to work with and the dough pulled away from the molds quite easily. The heart mold is pretty shallow, compared to the cat mold, which has the deepest imprinting. All three of my molds turned out great imprints and next to no sticking at all with the powdered sugar.
I also learned that I should bake like-sized cookies on the same sheets. I put all the heart-shaped cookies on one pan. The original recipe for Springerle calls for putting anise seeds under the cookies, with that being the only flavoring. Since most Americans are not fans of Anise, I’m using almond oil. And on the hearts, I sprinkled unsweetened cocoa powder on the parchment paper. For the pan of kitties and ladies, I sprinkled cinnamon on the parchment paper.

I let these sit over night, about 16 hours as it was a chilly and not very humid day. They rose pretty well, and the designs stayed in them while baking. I overbaked the kitties/ladies tray just a bit, but the hearts were perfect. After cooling, I put them all in plastic bags and took them to work.

While everyone was impressed with the designs of the heart cookies, the others were favored for the cinnamon flavor. I held back a whole bag of them, as the flavor is supposed to “ripen” for a week. I took them up to game day at the pub, where lots of people ate the kitty cookies. The flavor did settle in better, and the texture was fantastic. I was asked for the recipe already, and my game group said they’re happy to be my “beta” testers for future batches of cookies.
I started another batch this morning, but using a different recipe, along with some different techniques about working the dough and working the designs. Also? I totally need to crowdsource the money to get a KitchenAid stand mixer. I could send everyone cookies in return. Especially after I start the PAINTING of them! Once I get the recipe I’m happy with and get all the flavors set I want to try, I’ll be sending out lots to people to test.
Springerle Experiment
Back in 2005, while working at the Maryland Renaissance Festival, I met a bloke named James Matterer. He runs the site, Gode Cookery, and had some Springerle cookies which he was passing out to people. I believe he had come out specifically to see Wolgemut, in his travels around the country. For years, I had seen all sorts of molds, but never really knew what they were for. Since I’m a fan of medieval cooking, I was fascinated and wanted to know how they were made and where on earth he picked up the molds. I cannot recall where he bought the molds, or any other info about them. We talked about the old way of making them and the modern way. It’s difficult to find Hartshorn, as that is what you use instead of baking soda. You /could/ substitute, but he wasn’t a fan of it.
When I was back at home, I scoured the intarweb and found House on the Hill, which specializes in molds & baking paraphernalia for Springerle, Gingerbread, and Speculaas (which I also love). I immediately ordered the catalog. It’s been 7 years since I did and I still have it. I’ve been known to carry it around randomly, to show people something I am passionate about. You’d think being all nerdy, I would have started on this project much earlier. Things weren’t going well for me back then so I put it off. And I’ve kept putting it off for no good reason at all.
When I was visiting Germany, I was excited to see some medieval Springerle molds in a window display for the local museum.

Terrible picture, but you get the idea.
I decided right there that I was ready to learn how to make these delightful cookies. I was determined to pick up a couple of molds at some point during my trip. When Iain and I visited the Württemberg State Museum for the Celtic Exhibit, I wanted to check out the gift shop. They had HEAPS of cookie molds. It took a while, but I narrowed it down to two. I resisted buying more, but I didn’t want to be stuck with a whole bunch of these if I decided that making this a hobby was not for me. The museum gave me a recipe for springerle along with some information about the molds.
When back home, I hit up the online shop to pick up hartshorn aka baker’s ammonia. I also picked up a beginners kit for springerle (sample of hartshorn, flavored oil, and recipe book), and a rolling mat. I chose to start with almond flavoring instead of anise, since it’s much more suited to American tastes. Generally, that is. I’m definitely going to try with anise another time. I received the package of goods on the 24th. I thought I had everything I needed for the recipe, according to the kit book. I realized later, after shops were closed, that I did not have near enough powdered sugar. I also realized that this recipe was for a HUGE amount of dough. I found the German recipe from the museum and translated it. Turns out it is a much smaller recipe, both the ingredients list and the amount of dough I’d have.

All the ingredients I would need.
I inspected my springerle molds to make sure there weren’t any splinters. Or dirt. Or anything else. I would hate for someone to take a splinter to the gums while eating one of these.
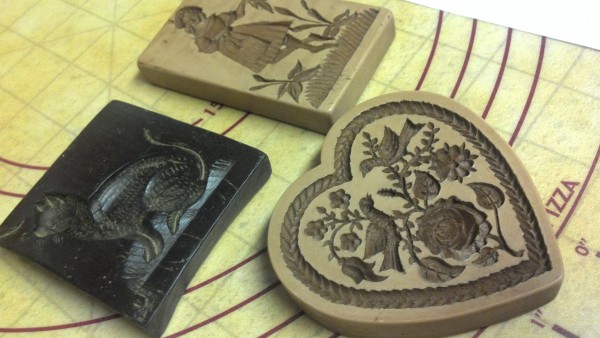
The cat one needed some work; the other two were fine.
I realized once I put in the flour, that I hadn’t taken into account the size of my eggs. It wasn’t dough; it was batter! This is where I don my robe and wizard hat. I decided to experiment. I started adding more flour. Lots more. Upped the powdered sugar, and hartshorn. Since the almond oil is concentrated already, I didn’t add more. I think I had too much to begin with anyway. I finally managed to get a good dough out of the mess. Wrapped it up to let it chill for an hour in the fridge.
Now comes the tricky part. Time to roll and press! I had no idea how thick it should be in relation to these size molds. Every recipe I’ve found lists something different.
ARE YOU READY TO ROOOOOOLLLLL
I actually rolled it out at different thicknesses so I could see which would work best. I’m kinda awesome experimental that way.
Lots of different shapes, sizes, and thicknesses.
Time to let them sit! The reason you let them dry over night is so the part of the cookie with the print will rise. When baking, the cookie will automatically rise the design up over the rest of the cookie. Well, in theory, that’s how it is supposed to work. Today, I picked a medium random temperature so as not to burn the cookies. I left them for 10 min, and then for another 7. As I found out later, that was WAY too long. If I had been doing larger molds, I would have dropped the temperature a little and cooked them for that length.
Different dough thickness resulted in different size cookies.
I found a great video tutorial *after* I had already made the cookies, so I quickly realized where my mistakes were. I’m going to try the recipes I found on Springerle Joy and The Springerle Baker sites. I also need to buy a pastry brush, as it would have made dusting the molds easier, plus I could have easily removed the flour from these after they were baked.
There are some good and bad mixed in. I should have pushed the dough down on the lumpy ones while baking.
I just ate one and they are almondy delish! Definitely too thin and dry on the one I’m eating. I’ve put them all in a tin and I’ll see how different they are when I get back from seeing family later this week.
Pretty! Now if only I had cut this one out fully!
Red Wine & Mushroom Chicken Recipe
Red Wine & Mushroom Chicken
INGREDIENTS:
1 tablespoon olive oil
4 skinless, boneless chicken breast halves (I used 3..since there are 3 of us)
3 tablespoons whole wheat flour
2 tablespoons minced shallots
1/2 cup red wine
1/2 cup chicken stock
Fresh mushrooms, sliced, as many as you want
1 sprig fresh tarragon (Also did not have fresh, so I used about 2 tsp-ish dried)
3 1/2 tablespoons port wine
1 tablespoon chopped fresh parsley
(I also added about two cloves of garlic and some fresh black pepper)
DIRECTIONS:
In a deep skillet, heat oil on high. Coat chicken with flour, add to skillet, reduce heat and cook on low for 10 minutes (or until cooked through). Remove chicken breasts to a platter and keep warm.
To the same skillet, add the shallots, saute for 1 minute, then add wine and heat until reduced by half. Add stock and heat for 5 minutes until sauce thickens.
Meanwhile, in a small pan, saute mushrooms in a little oil. Add tarragon to mushrooms, then add both to the chicken and wine sauce. Cook all for 7 minutes, stir in port and cook for 5 more minutes.
Arrange the chicken on a platter and spoon sauce over it. Garnish with parsley. Serve.

Tasty Noms Recipes!
I saw Glynis Mitchell talk about Breakfast Risotto on Twitter. Until I received this Australian cookbook when I was living in Perth, I would have never thought of risotto for breakfast. As soon as I saw it, I fell in loooove. I told her I would post the recipe, but while I’m writing, I’ll just jot down a few other faves of mine.
Breakfast Risotto – We use less sugar, because I am not a fan of sweet things.
1 cup Arborio Rice
5 cups milk
2 tbs vanilla extract (or 1 vanilla pod, split, with seeds scraped out)
1/2 cup sugar
Place all ingredients in a heavy bottomed pan, stir and bring to the boil
Reduce heat to a simmer and continue to stir for up to half an hour, until the grains are cooked through and most of the liquid is absorbed
Serve topped with sliced bananas and a drizzle of honey
Caramelized Bacon – A couple years ago this idea came to me after drooling over and finally eating, the Maple Bacon Bar from Voodoo Doughnuts in Portland.
1 slab thin-sliced bacon
2 cups brown sugar (A guesstimate?)
3 tbsp cinnamon (Another guesstimate?)
Unsweetened cocoa powder for garnish
Heat oven to 300F. Mix brown sugar & cinnamon in a bowl. Cut slab of bacon in half.
Take each halved bacon piece and dredge it in sugar/cinnamon mix
Twist and place on broiler pan. You really need a broiler pan for this.
Bake in oven for 20-30 min, depending on your oven. You want it hot enough to cook, but not so much it is burning everything and stinking up the house.
Bacon pieces will /look/ burnt, but they are not.
When finished cooking, remove from oven and immediately put pieces on a glass plate. Sprinkle small pinches of the cocoa powder on each piece and place in freezer. I usually leave the plate in 10 minutes. Since I’m usually taking this to a party or other location, I cover the cold place or put the pieces in a container.
Taco Stuffed Pasta Shells This originally came from a cookbook I had LONG ago, but I’ve modified it. I lost the book in a flood, so I just do this from memory every time. I haven’t actually written down the measurements, but then, it’s not rocket science on this one.
Ingredients:
1 box jumbo pasta shells
1 lb ground beef
1 small container green onion/chive cream cheese
4 tbsp chili powder
1 tbsp cumin
2 tsp black pepper
1/2 cup crushed tortilla chips
1/2 cup salsa (I use D.L. Jardine’s Chipotle Salsa)
1 package shredded cheddar cheese (You won’t use the whole bag, but cheese measuring ain’t my thang!)
1 cup sour cream
1/2 cup green onions or chives
Directions:
Heat oven to 400 degrees. Prepare pasta as normal. Drain and coat with butter/margarine.
While pasta is cooking, brown grown beef in a skillet. Once brown, add in black pepper, salt, and garlic powder to taste. Add in chili powder & cumin. Mix well. Add 1/2 container of the cream cheese (put the rest in the fridge; you won’t need it). Once mixed, set aside to wait for pasta.
In a 9×12 pan, lay out the pasta shells which are intact (no tears or pieces missing). Put as many as you can in the baking dish. Fill each shell halfway with beef mixture. If you have beef mixture left, you can put aside with the broken pieces of pasta for a later snack or just use whatever is left over equally in each shell.
Spoon a small amount of salsa over each stuffed shell. Sprinkle crushed tortilla chips on each shell. Cover with foil and bake in the oven for 15 minutes.
Remove from oven and remove foil covering. Sprinkle cheese over each shell and bake for another 15 minutes. Serve the shells on to plates and then garnish with sour cream and green onions.
Honey Glazed Stuffed Chicken Breasts – I found this recipe long ago and love to make it. It is excellent with grilled portabellas on the side.
INGREDIENTS:
4 skinless, boneless chicken breast halves
4 tablespoons Boursin cheese with herbs (I actually use goat cheese, sprinkling black pepper & tarragon)
8 slices bacon
Toothpicks
1/2 cup honey
DIRECTIONS:
Preheat oven to 350 degrees F (175 degrees C).
Cut a slit in each chicken breast, and stuff with equal amounts cheese. Wrap each breast with 2 slices bacon. Secure with toothpicks. Arrange on a baking sheet.
Bake 25 minutes in the preheated oven, or until chicken juices run clear. Drizzle breasts with equal amounts of honey during the final 5 minutes of cook time.
Mushroom Pie This recipe came from a Swedish medieval music CD called “Figs, Fiddles and fine play”. I picked it up when I was visiting my Star Wars Galaxies Guildmates from Gorath.
INGREDIENTS:
17oz Mushrooms
2 tablespoons olive oil
3 1/2 oz cottage cheese
1 oz Pecorino cheese
1 oz cheddar cheese
1 teaspoon ground ginger
1 teaspoon black pepper
2 tablespoons chopped garlic
1 tablespoon olive oil to cook the mushrooms
Pie crust:
1 1/2 cup flour
5 1/2 oz butter
2 tablespoons cold water
1 teaspoon salt
Mix up the pie dough and press it into an oven proof dish. Put the dish in the fridge while you cook the mushrooms. Wash the mushrooms and cut them in half if necessary. Saute mushrooms briefly in olive oil until they shrink a bit Mix cheeses, oil and spices with the mushrooms. Put the filling in the pie crust and bake for 45 minutes in pre-heated 400deg oven. Sprinkle chopped parsley over the pie and serve with a good ale.

You must be logged in to post a comment.